


一直在想要用什麼當資料庫同時能好閱讀又好瀏覽
很久以前接觸 Notion 當資料庫使用時
內容還需要搭配 google sheet 才能串接到網站上 ><
現在發現容易許多
於是就打算來試試看
然後就成功喇 🥳
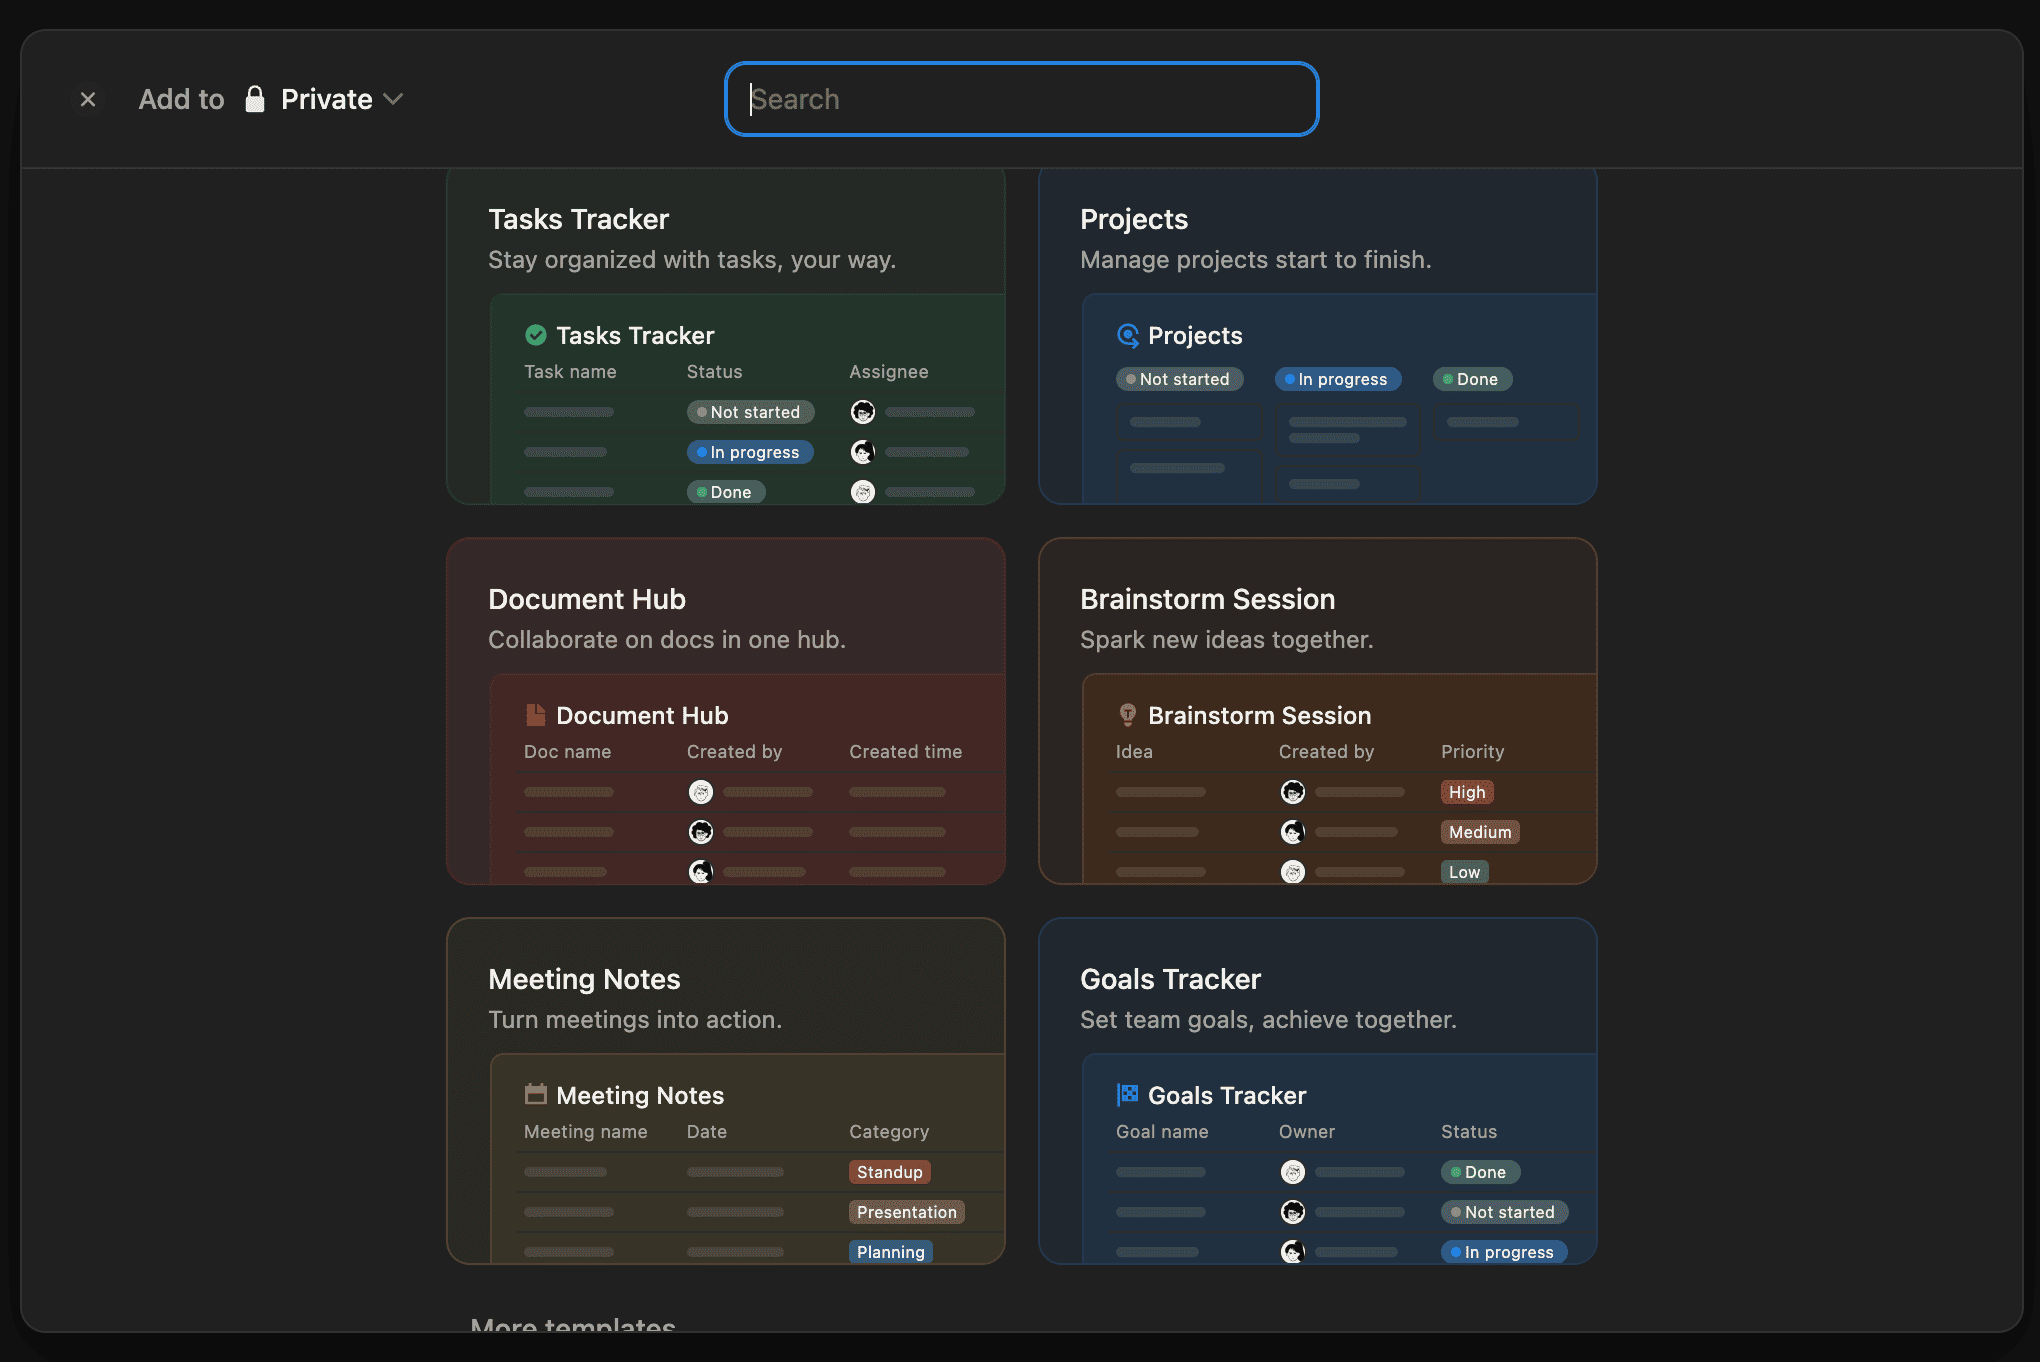
1 . 先新增 database ,這邊我是選 Document Hub 的模板
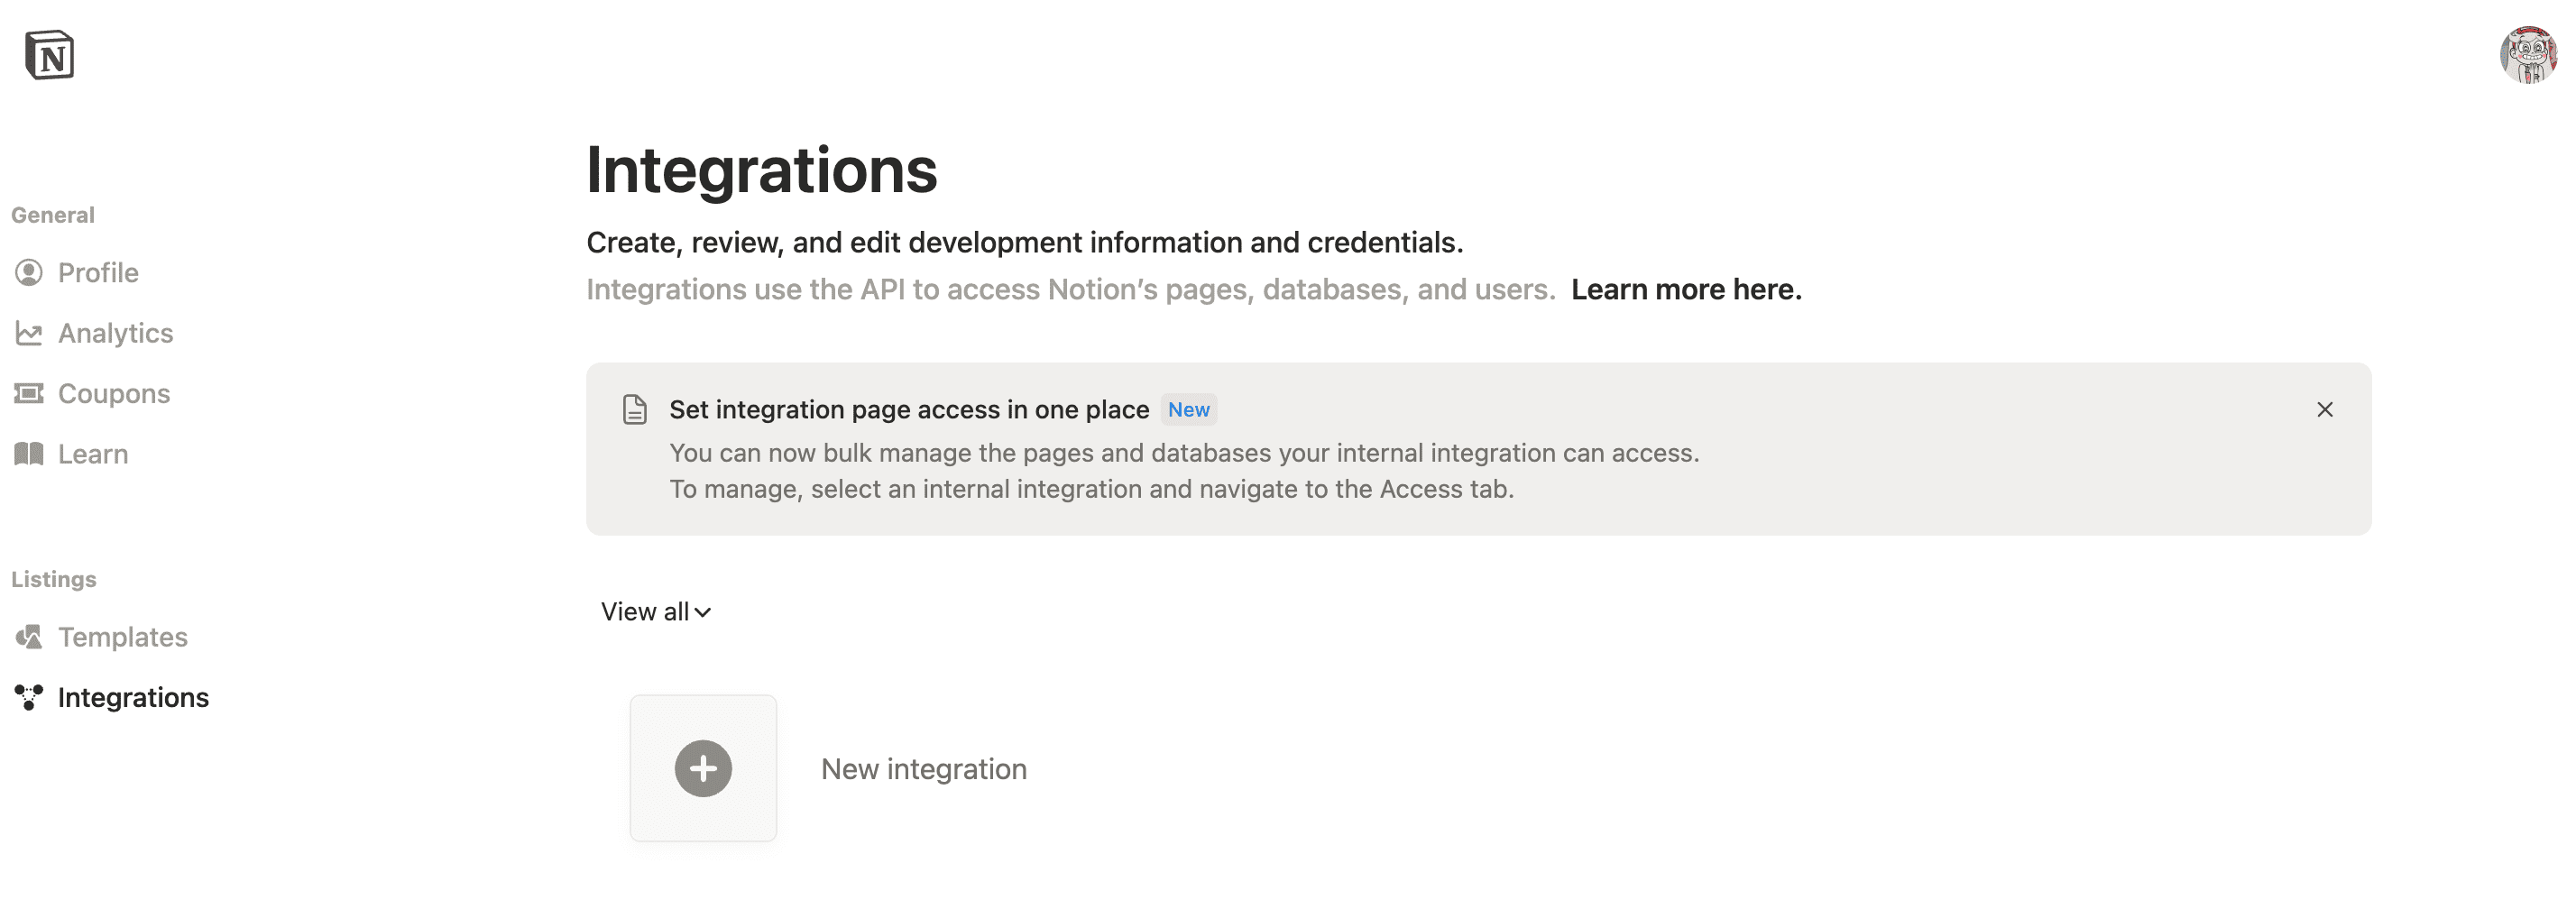
2 . 需建立 instance ,右上角選單點擊後,點選 Connections ,再點選 Develop integration

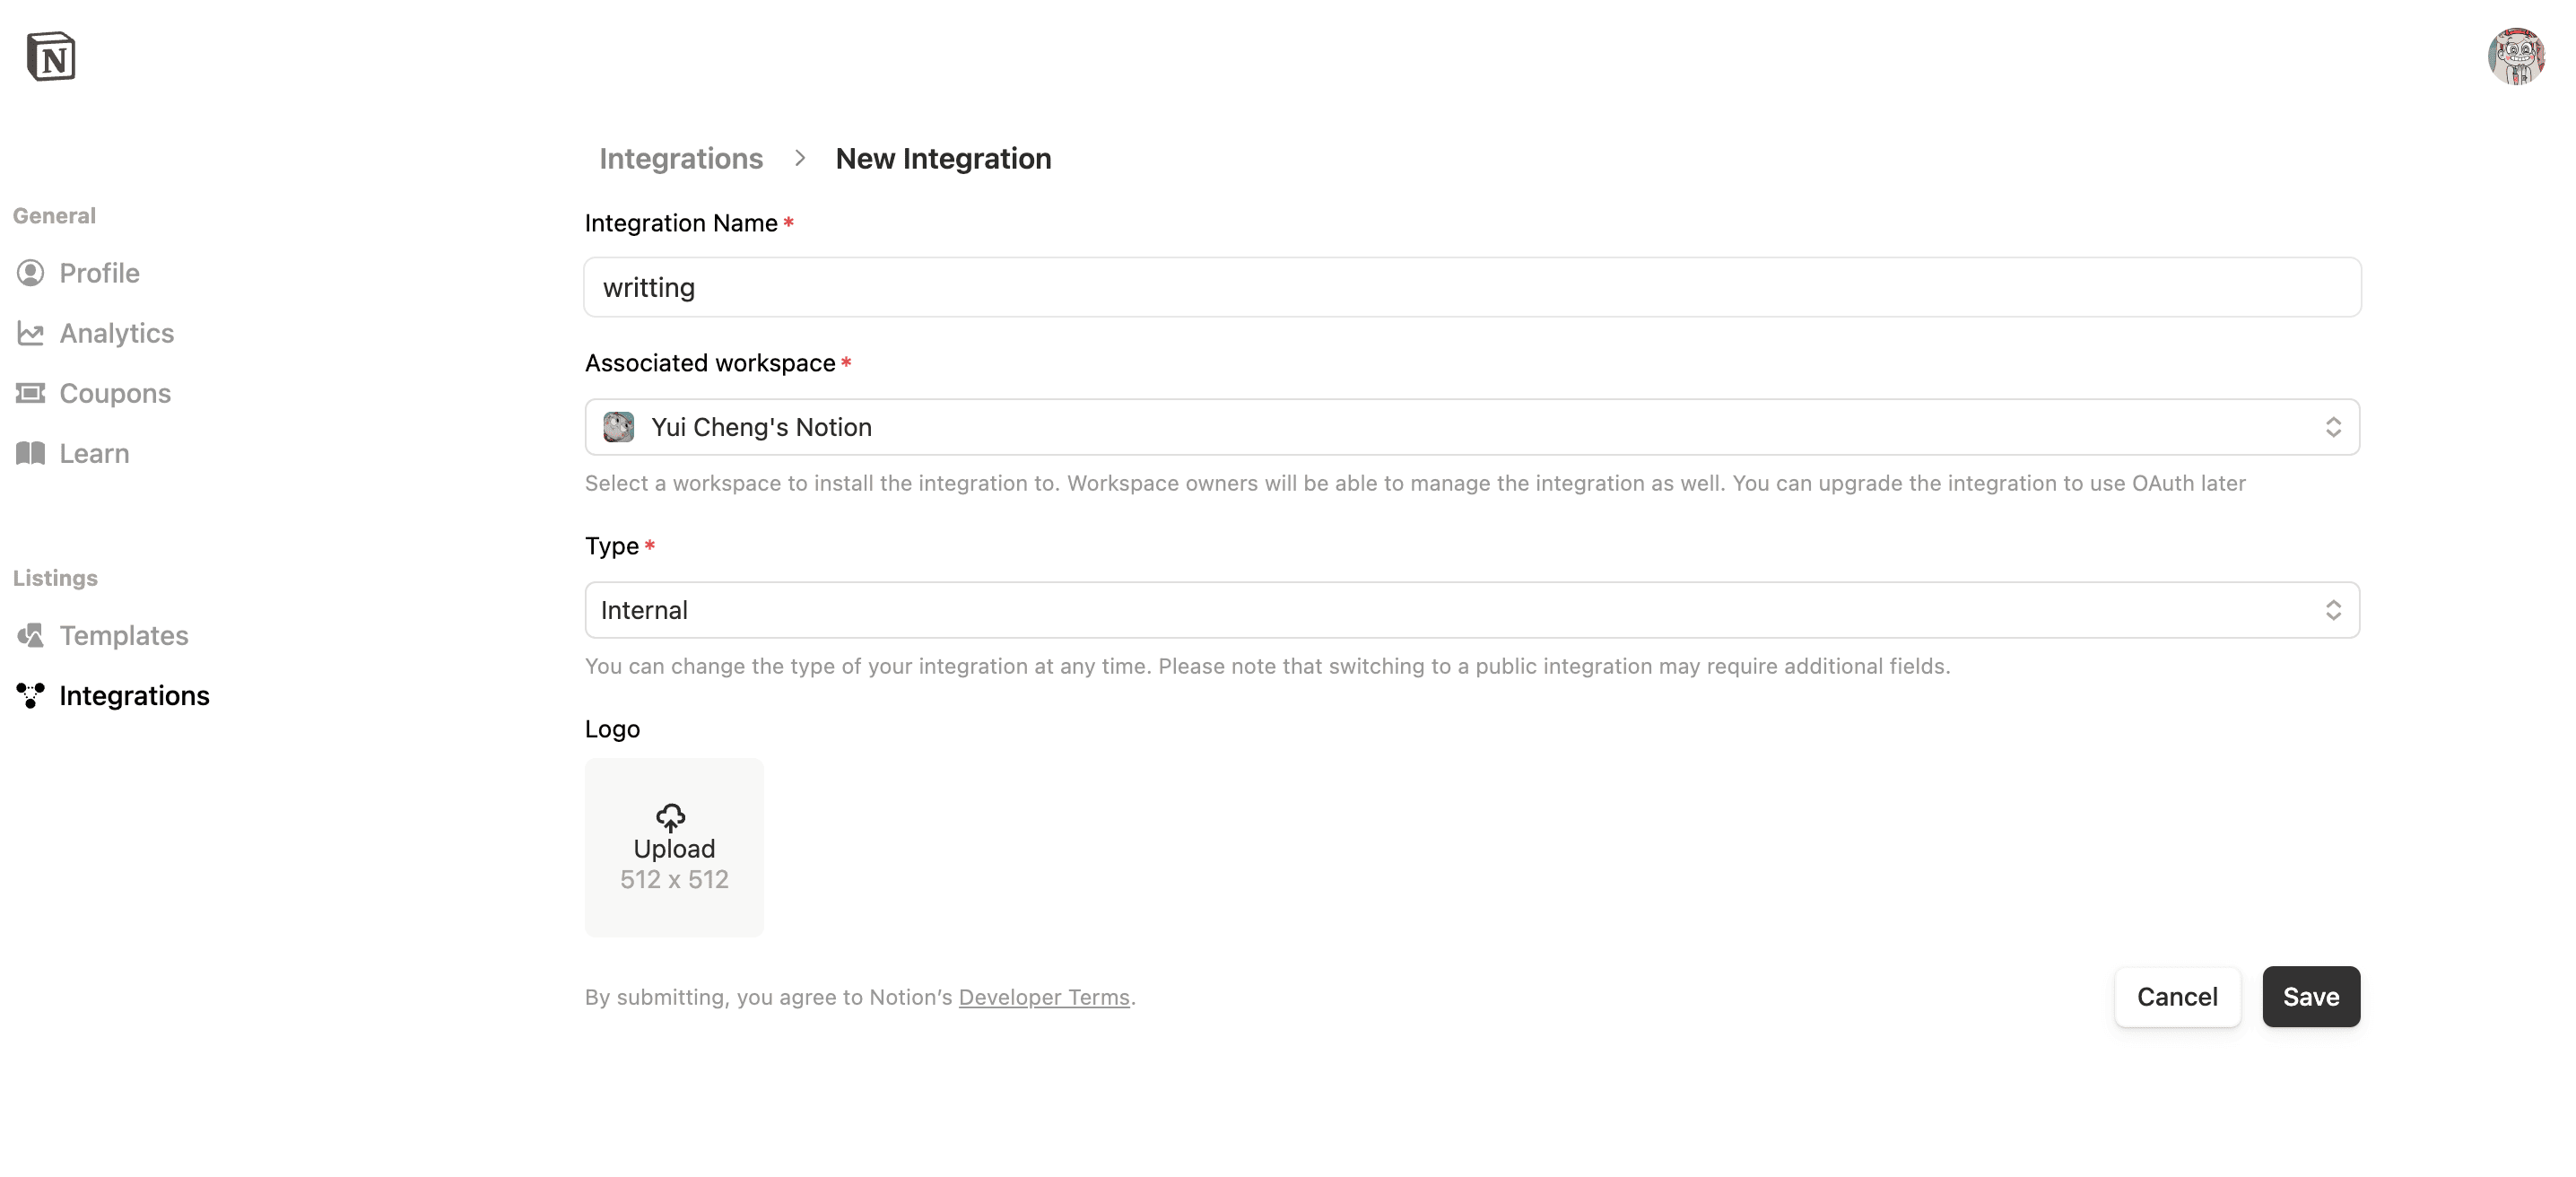
3 . 他會自動開啟這個畫面,點擊 New Integration
4 . 設定 instance 資訊,並選擇要連線的工作區域
5 . 最後可以取得 Notion 的金鑰
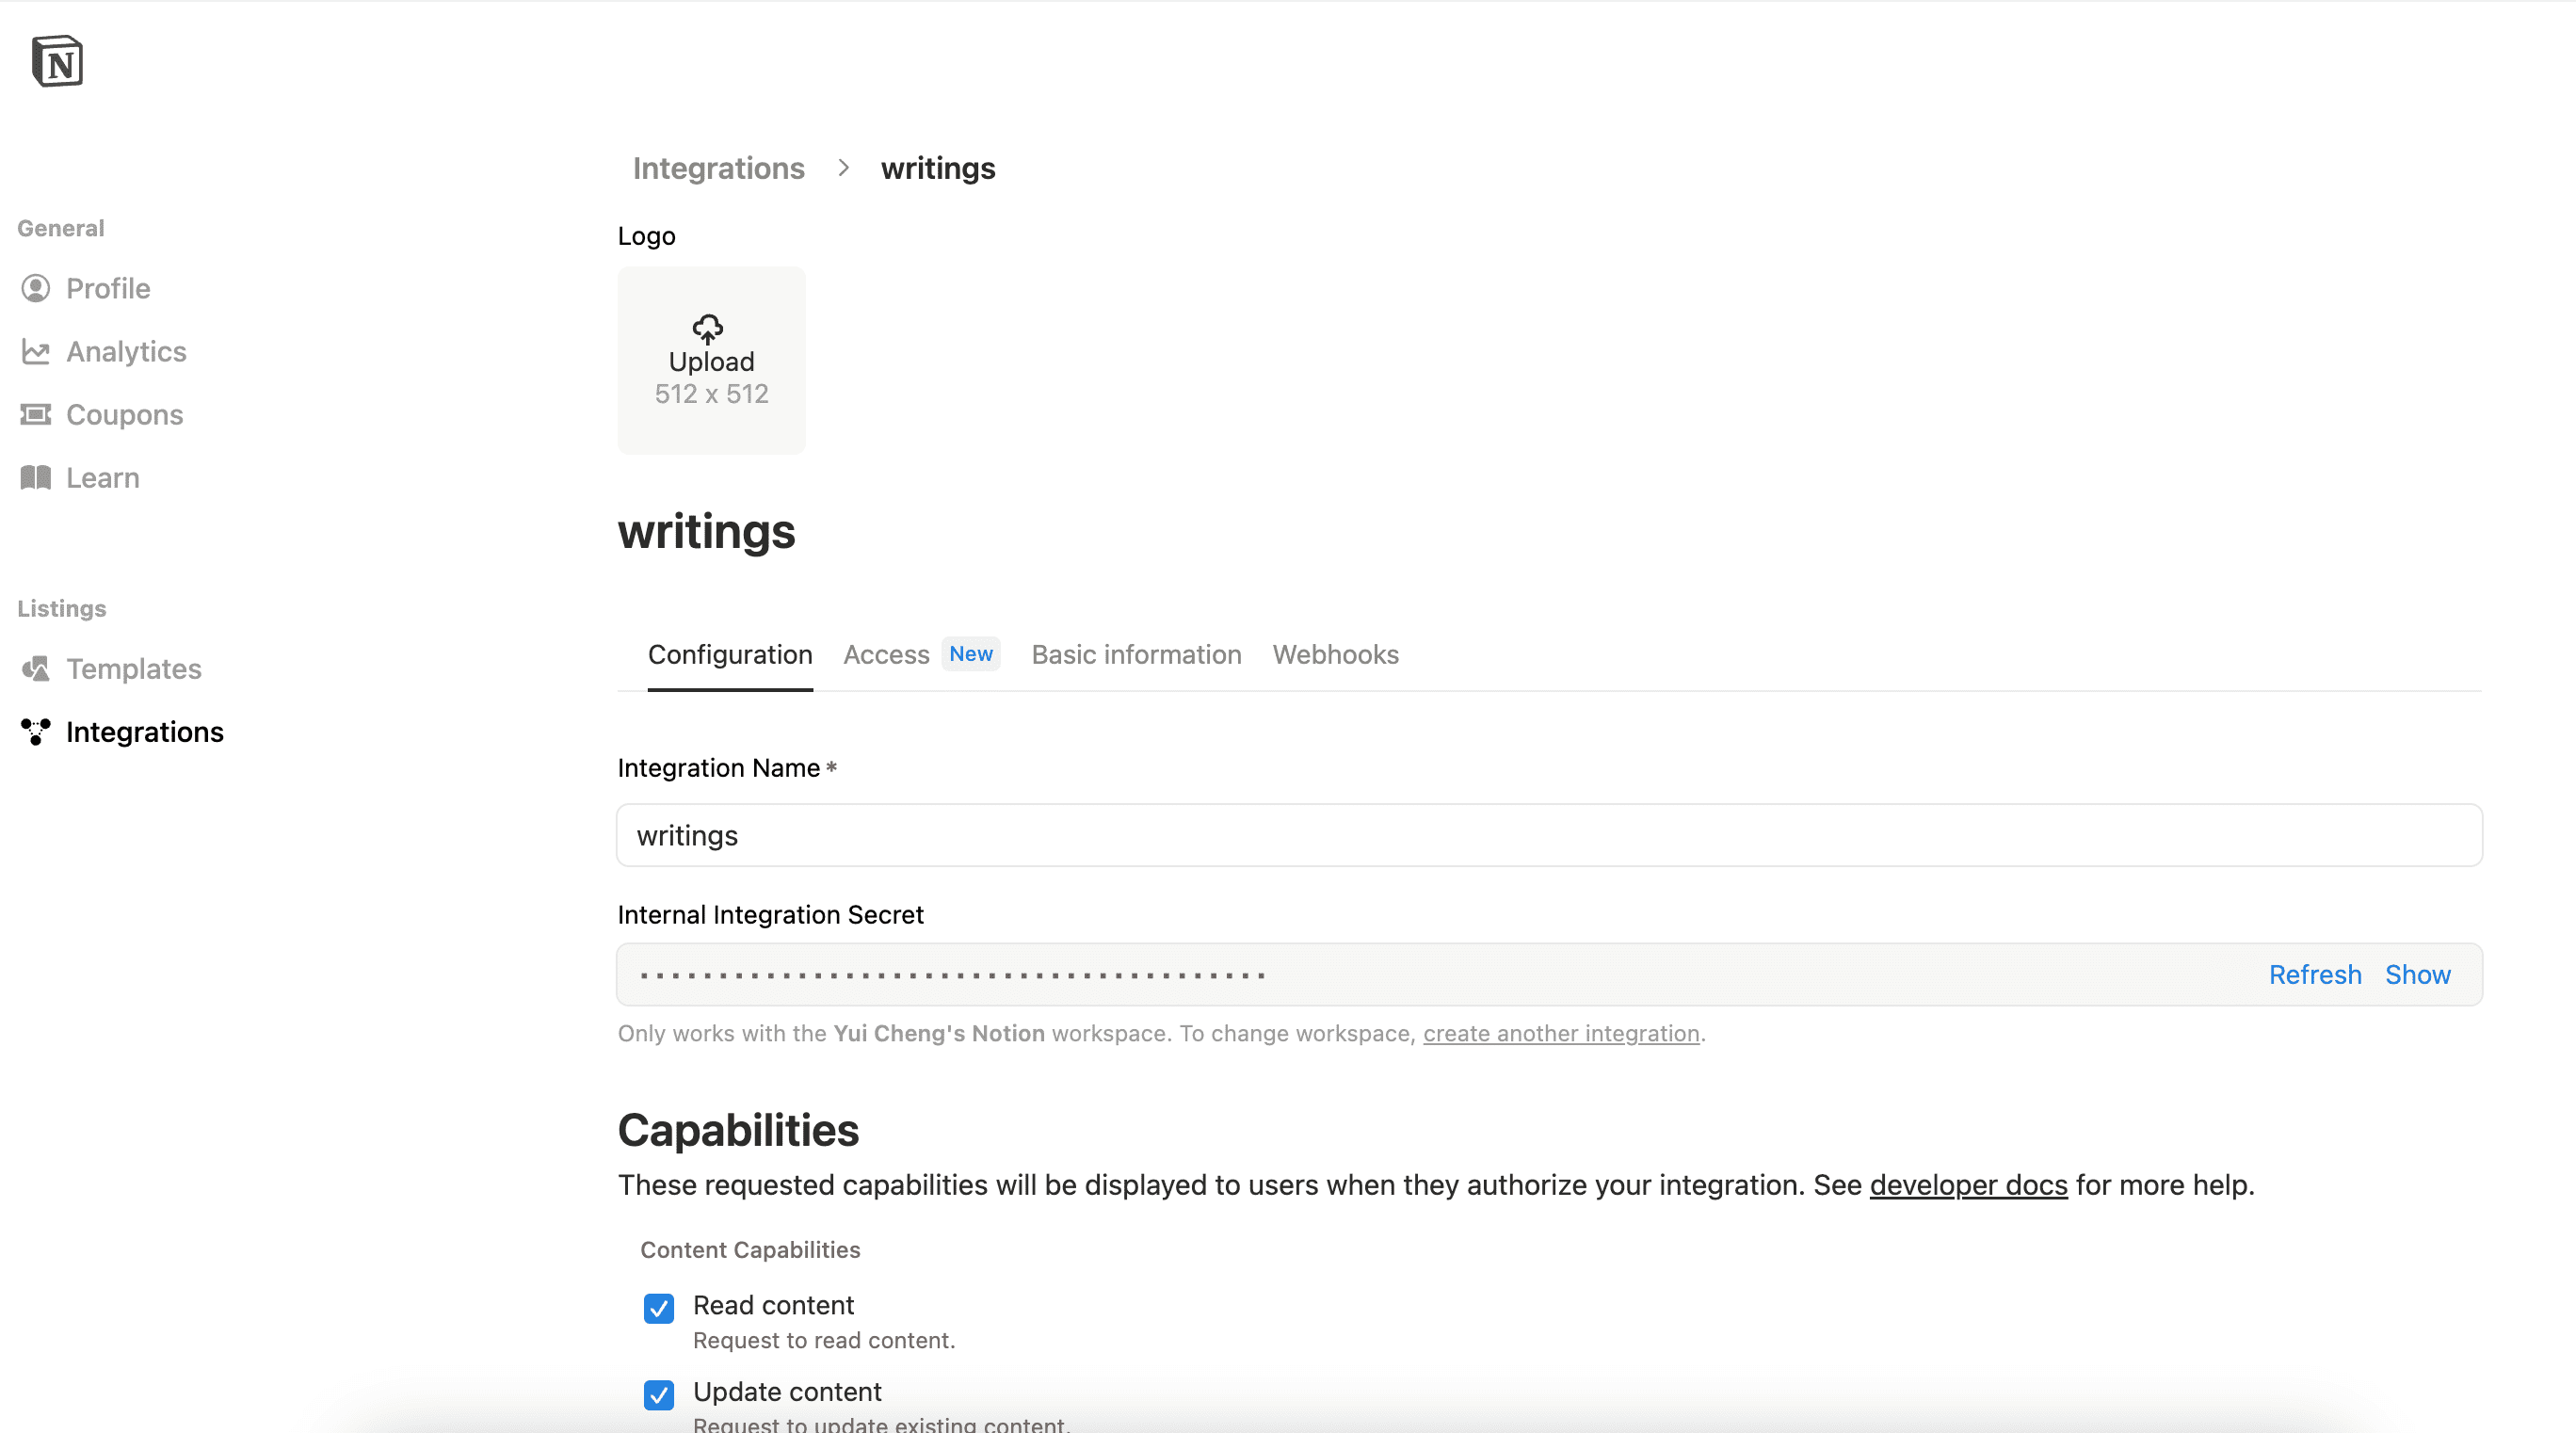
6 . 可以在這邊確認有沒有連接上
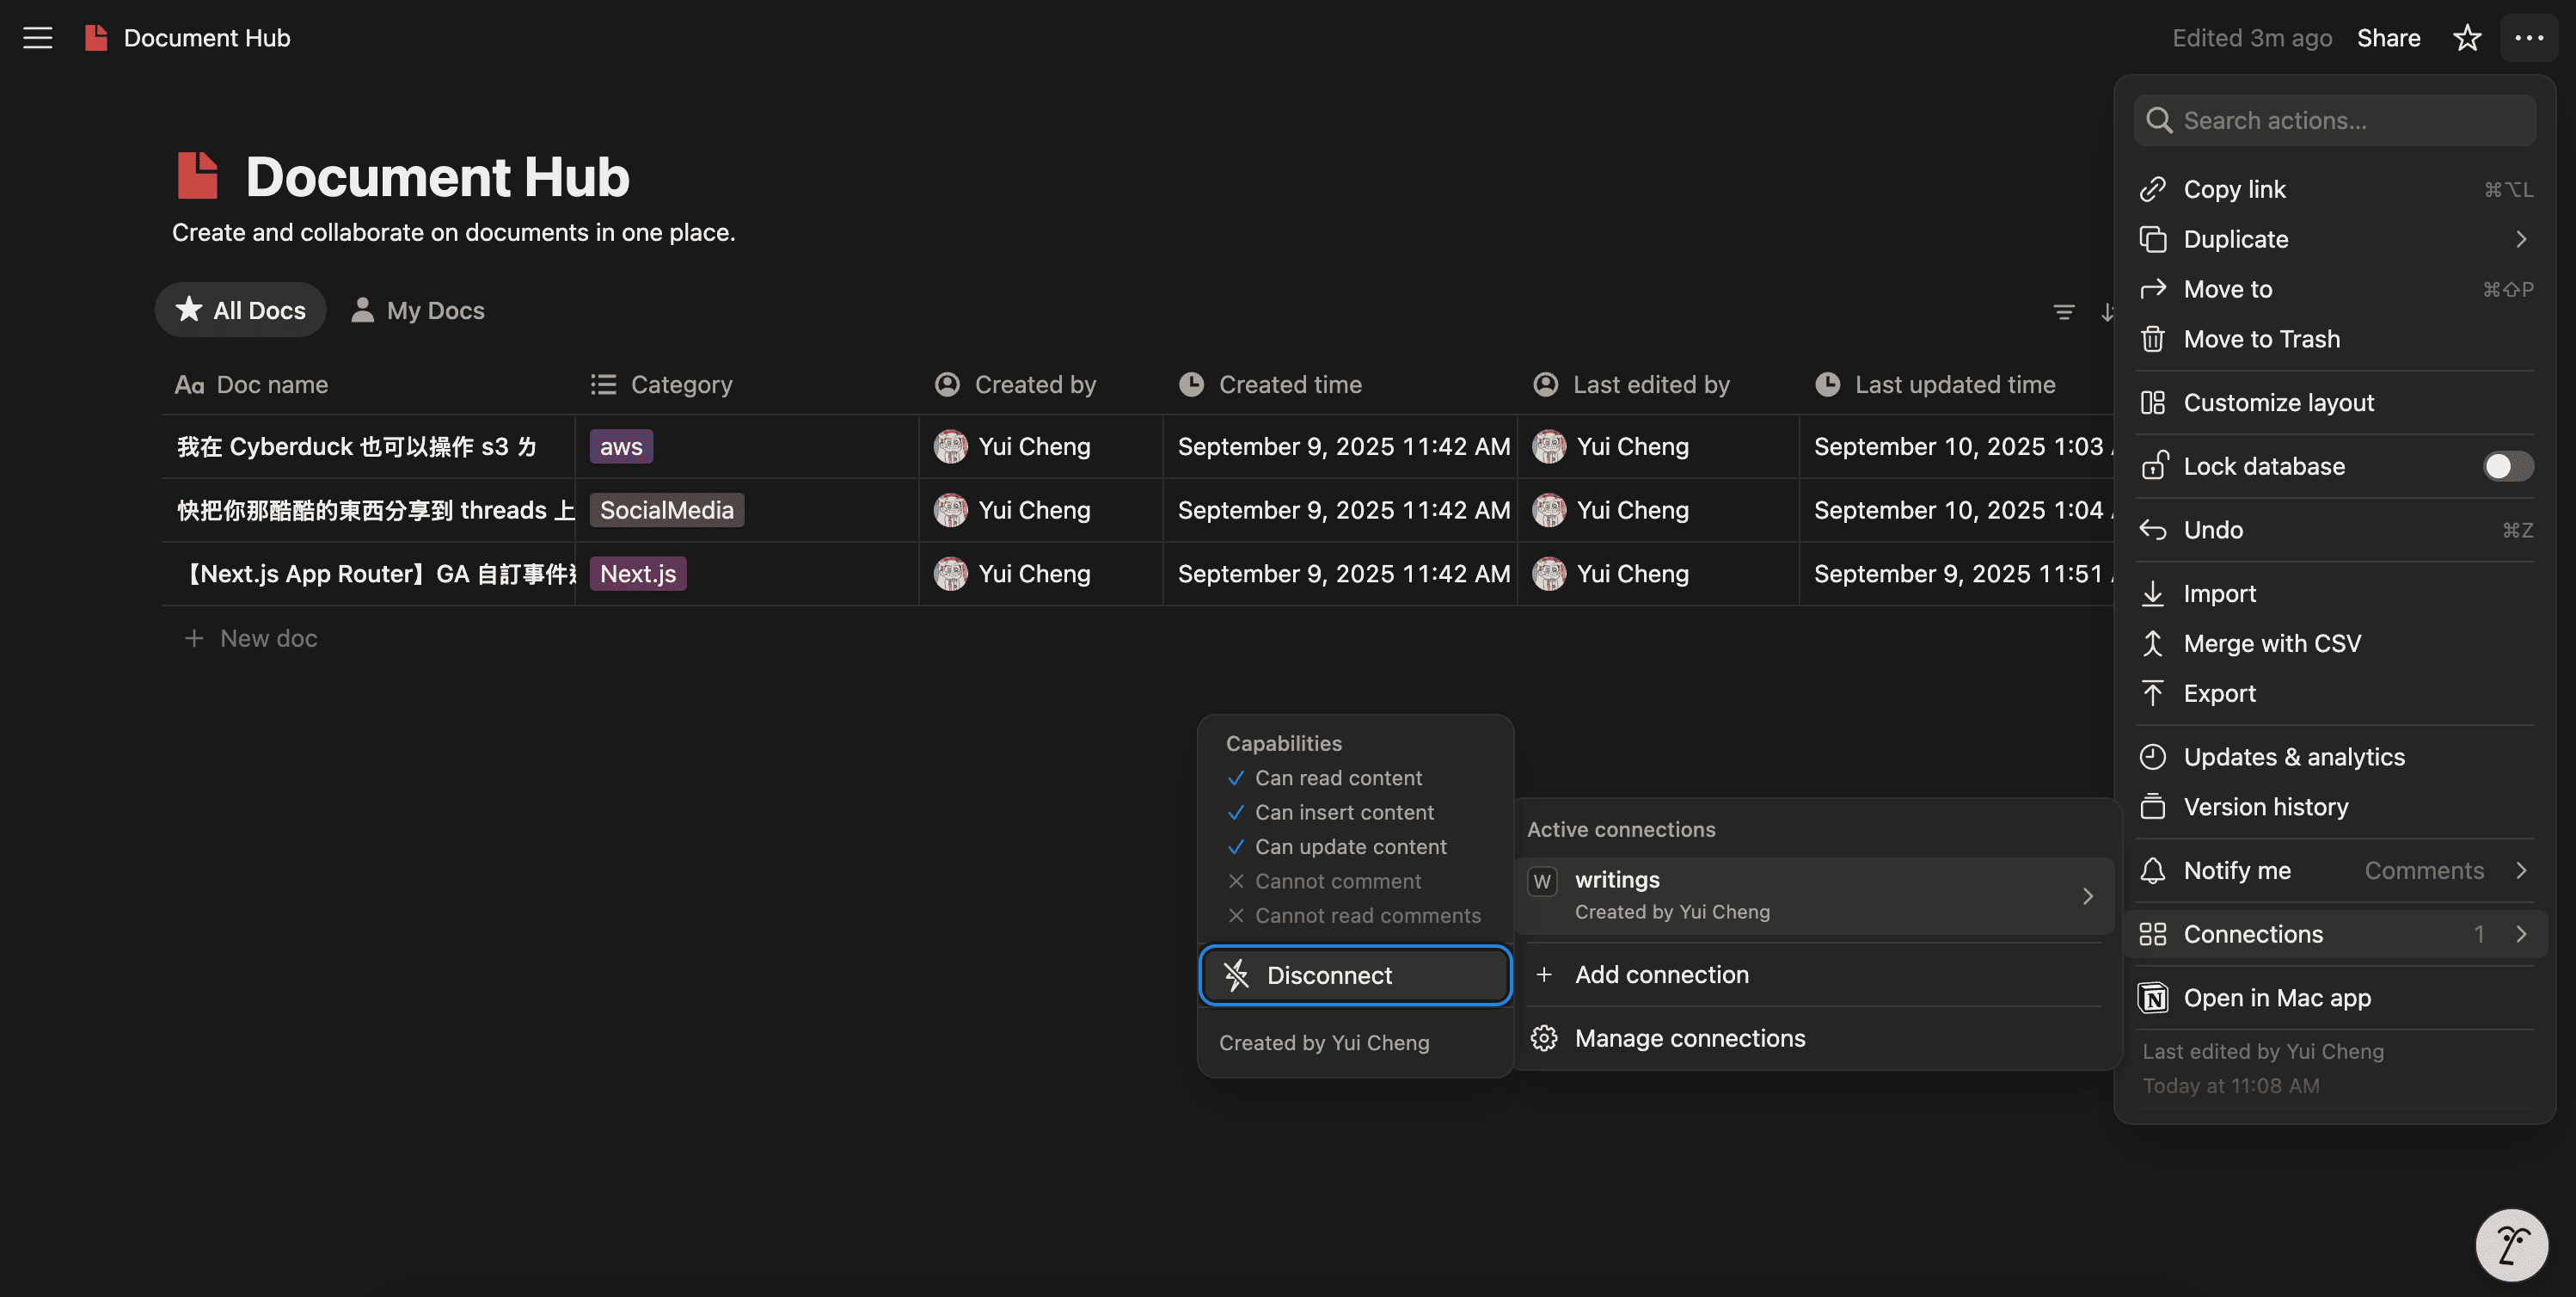
以上是資料庫連線取得金鑰方式
Notion 有提供 TypeScript/JavaScript SDK 的一些請求 api 的方法可以使用
會更方便取得資料內容 ~
1 . 先安裝套件到專案中
npm install @notionhq/client
2 . 初始化
const notion = new Client({
  auth: 'Notion 金鑰',
});
3 . 因為目前只有這個資料庫,所以可以直接這樣做請求
const res = await notion.search({
        query: '',
        page_size: 100,
      });
Notion 最多回傳 100 筆資料
但因為這樣取得的資料會有這樣的資料結構
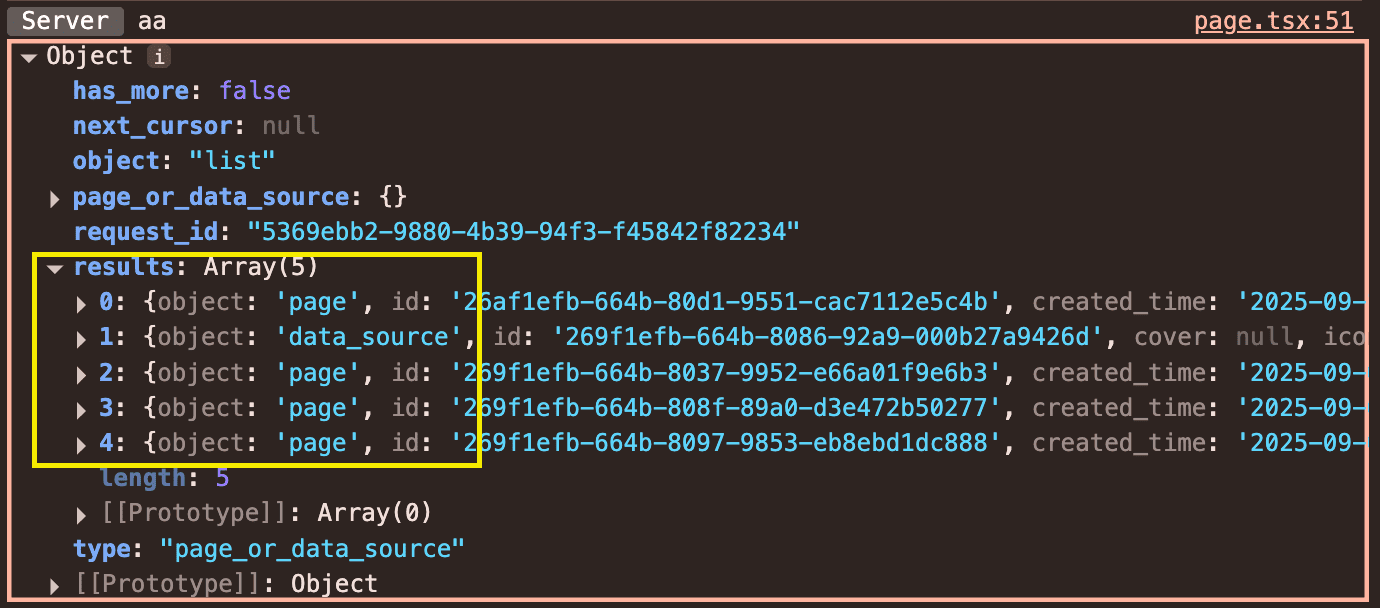
data_source 是這個資料夾的資料,像是資料夾的名稱、介紹、icon 跟自定義的 tag 等等
page 則是我這資料庫裡面的文章資訊
所以如果要分開請求可以這樣寫
const res = await notion.search({
        query: '',
        page_size: 100,
        filter: {
          value: 'data_source', // 參數的值
          property: 'object',   // 參數的名稱
        },
      });
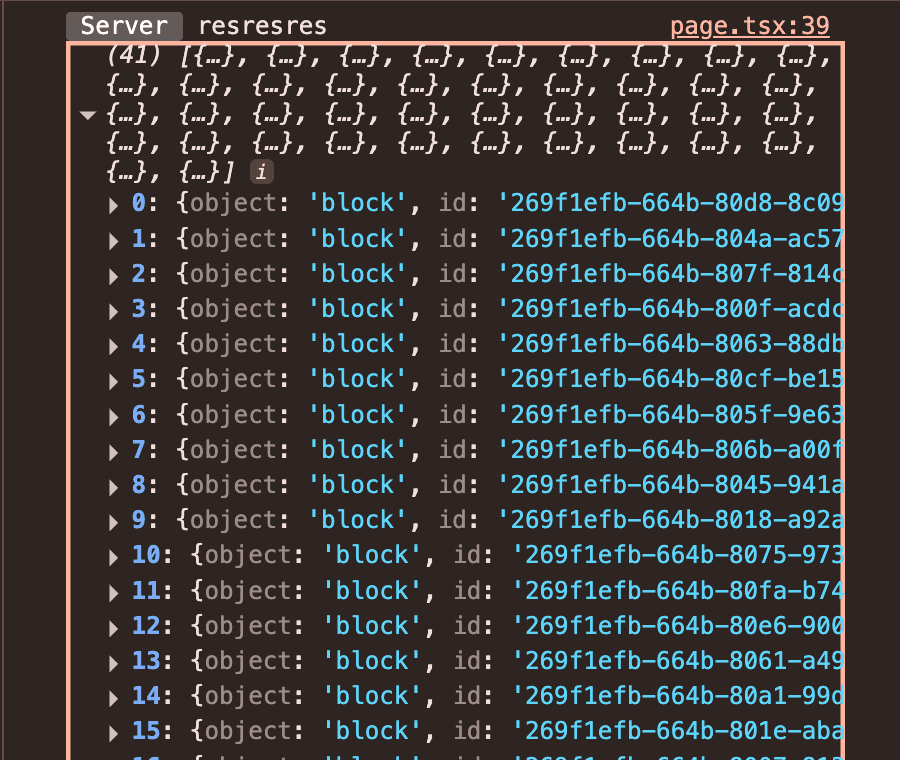
4 . 取得該筆頁面的資料
const { results: res } = await notion.blocks.children.list({
        block_id: slug, // page 的 id
      });
Notion 會回傳一個 results 陣列,這個陣列中每一個元素都是一個 Block Object,用來描述頁面裡的一段內容
這些內容原本在 Notion 裡是 Markdown 格式,但透過 API 會被轉換成結構化的 JSON 物件
原本是我將這些再轉成 Markdown 格式,但因為使用的套件沒有支援太多格式,所以後來有找到其他方式去呈現
就是 @notion-render/client 他會把 Notion 回傳的資料轉成 HTML 檔
5 . 使用 @notion-render/client 呈現 Notion 文章
5 - 1. 首先一樣先安裝
npm i @notion-render/client
5 - 2. 接著使用方式一樣要先初始化
const notion = new Client({
  auth: process.env.NOTION_API_TOKEN,
});

// 初始化
const renderer = new NotionRenderer({
  client: notion,
});
5 - 3. 使用方式則是請求到資料後,使用他的方法就可以拿到 HTML 的格式
const { results: res } = await notion.blocks.children.list({
        block_id: slug,
      });
const html = await renderer.render(...res);
但拿到的內容其實就是像這樣沒有修飾過的 HTML
所以我們需要自己把樣式寫上去~
樣式寫上去後,就可以得到美美ㄉ文章樣子喇 🥳
✨ Notion 圖床預設不是公開的,所以圖片會讀不到很正常! ✨ 可以將 Notion 圖片換成可以永久公開的 URL,像是 S3 或 Imgur 等
大概是這樣 heehee
參考:github copilot How to build a nextjs blog with notion cms
